Install PostgreSQL 16 with PGVector on Debian Server

In this article, we will cover the installation of the PostgreSQL 16 database with PGVector extension for semantic search applications using vector embeddings.
This article assumes you already have a Debian/Ubuntu web server running, and you have root access to that server.
1. Install PostgreSQL 16
First, we need to make apt aware of the latest release of Postgres:
sh -c 'echo "deb http://apt.postgresql.org/pub/repos/apt $(lsb_release -cs)-pgdg main" > /etc/apt/sources.list.d/pgdg.list'Now let’s add the key:
wget --quiet -O - https://www.postgresql.org/media/keys/ACCC4CF8.asc | sudo apt-key add -After the two previous commands were executed, we can go ahead and run the update/upgrade:
sudo apt-get update
sudo apt-get upgrade
At this point, apt should be aware of Postgres 16 and we should be able to install it:
sudo apt-get install postgresql-16 -yAfter installation is complete, we need to tweak a few things in config files to be able to connect to DB:
1.1 Listen on all interfaces
Go to postgresql.conf file and edit the following line:
sudo nano /etc/postgresql/16/main/postgresql.confChange line
#listen_addresses = 'localhost'To
listen_addresses = '*'This will allow us to establish connections from the outside world.
1.2 Whitelist your public IP address
This step is required to allow connections using PGAdmin from our PC.
First, we need to google “what’s my IP” and copy the result, i.e. 12.34.56.78
Now let’s edit the pg_hba.conf file:
sudo nano /etc/postgresql/10/main/pg_hba.confFind this line:
# IPv4 local connections:
host    all             all             127.0.0.1/32            scram-sha-256
and add the following line below:
host all all 12.34.56.78/0 md5This will allow connections from our public IP using password authentication. Now save and exit.
We are ready to start the server:
sudo systemctl start postgresql && sudo systemctl enable postgresql
sudo systemctl status postgresql
You should see something like:
user@server:/etc/postgresql/16/main$ sudo systemctl status postgresql
● postgresql.service - PostgreSQL RDBMS
   Loaded: loaded (/lib/systemd/system/postgresql.service; enabled; vendor preset: enabled)
   Active: active (exited) since Sun 2024-01-07 16:35:27 PST; 1min ago
  Process: 5236 ExecStart=/bin/true (code=exited, status=0/SUCCESS)
 Main PID: 5236 (code=exited, status=0/SUCCESS)

Jan 07 16:35:27 maptastic2 systemd[1]: Starting PostgreSQL RDBMS...
Jan 07 16:35:27 maptastic2 systemd[1]: Started PostgreSQL RDBMS
1.3 Modify your firewall rules
Depending on your config, you will need to whitelist incoming connections to Postgres on port 5432 (or 5433, check your config file). If you are using a cloud server, you will need to add a new rule to your Firewall (Google) or Network (Azure) settings. Please note, that you may also have a firewall installed on your server.
1.4 Change database password
In order to be able to connect to DB with PGAdmin, we need to change the password for the admin account as follows:
sudo -u postgres psql
postgres=# \password postgres
Enter new password for "postgres": <new-password>
Enter it again: <new-password>
postgres=# \q
1.5 Install and configure PGAdmin
That’s it! now go ahead and install PGAdmin on your computer.
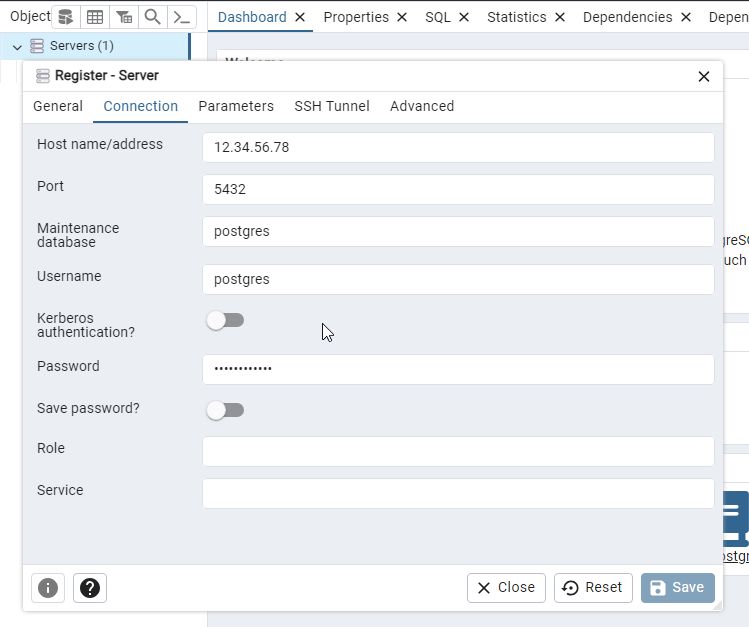
When PGAdmin has started, right-click on Servers and then Register > Server...
Enter the name of your database, then in connection settings enter the IP address of your server and the port, along with your new password from the previous step.

If all is good, you should be able to connect to your new database. If the connection times out – verify your public IP address, firewall rules, port number, etc.
2. Add PGVector extension
Now that the PostgreSQL is up and running, we can go ahead and install the PGVector extension by running:
sudo apt install postgresql-16-pgvector
Now restart the Postgres:
sudo systemctl restart postgresqlAt this point, PostgreSQL should be aware of the new extension called vector.
To start using that extension, you need to reconnect to your server using PGAdmin.
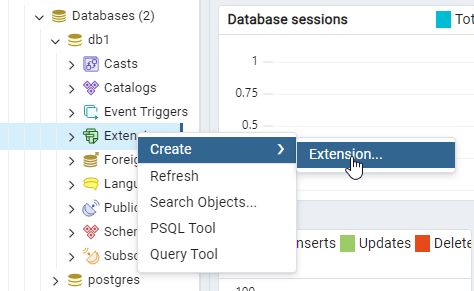
After that create a new database, right-click on Extensions > Create > Extension

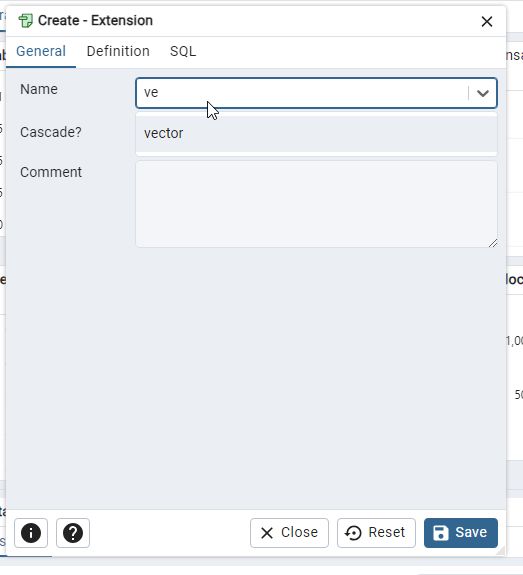
In the following dialog, search vector, select and Save.

That’s it! We are done and now we can create tables with the columns of type vector to use with embedding models like Ada, Gecko, and GTE!